


Last Updated By: Kyle Carbonneau, June 2018
Purpose: How to set up a printer or copier on a TMU owned PC.
Process:
Please use this documentation for School-Owned PCs. If you would like to print from a personal device, please contact the IT Service Desk.
1. Open the Start Menu and type \\print16 and press Enter.
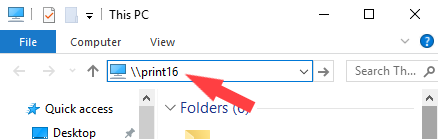
NOTE: The backslash mark (\) that is directly below the backspace key must be used.
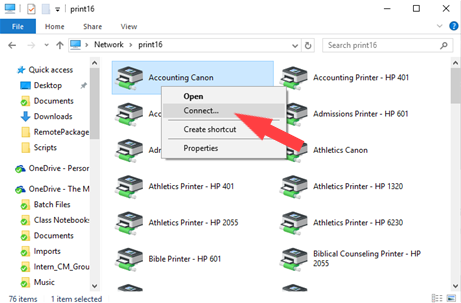
2. Choose the printer or copier that you would like to connect to. Printers and copiers are named by the department where they are located. Copiers will be named "Canon".
3. Right-click on the printer you want to install and select Connect.
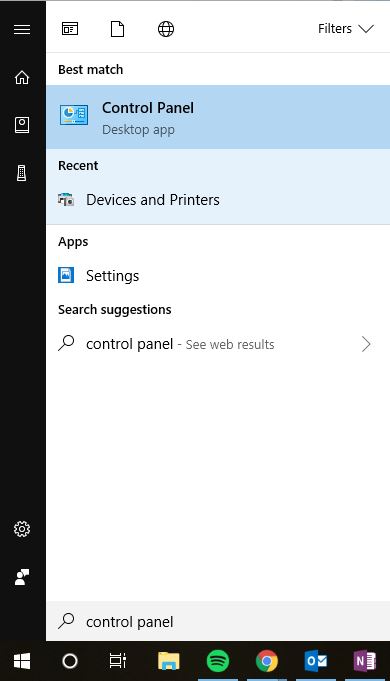
4. Search for Control Panel from the Start Menu and select the top option.
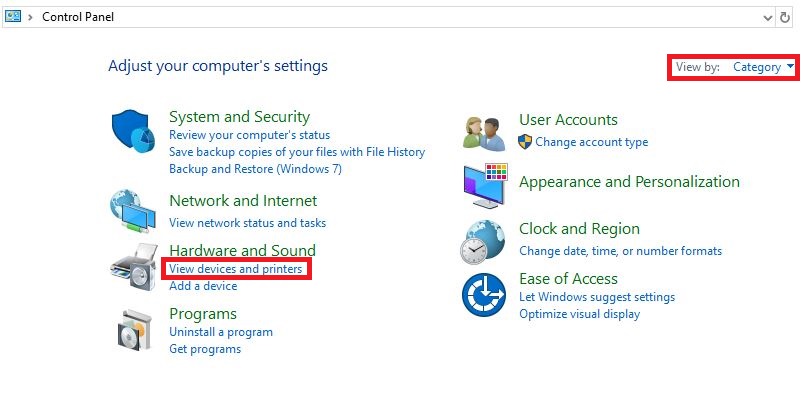
5. From the options available, select View Devices and Printers (Under Hardware and Sound):
Note: If you do not see this option, make sure that "View by" is set to Category.
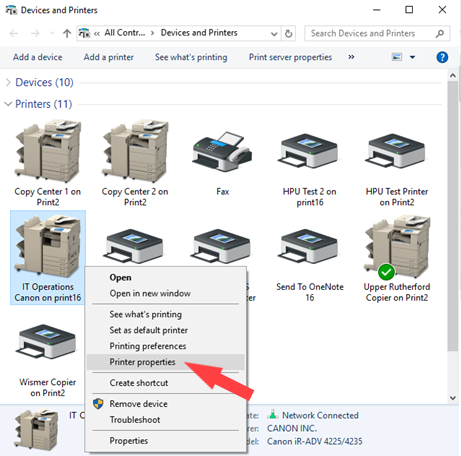
6. Find the copier you would like to print to, right click on it and select Printer Properties.
7. In the window that opens, select the Device Settings tab and ensure that the Use Department ID Management (J) box is checked.
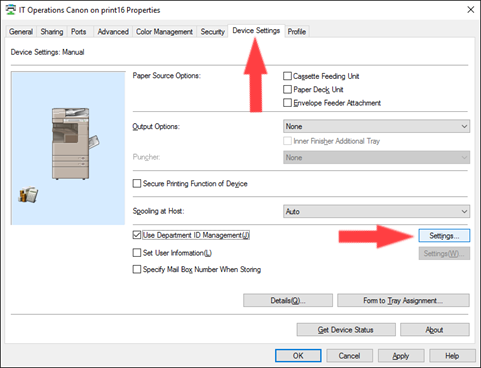
8. Click Settings. A smaller window will appear.
9. Ensure that the Allow PIN Setting checkbox is checked and type in your Department ID.
10. If you would like to not be prompted for your department code each time you print to the copier, uncheck the Confirm Department ID checkbox.
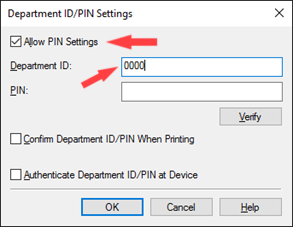
11. Press OK on the Department ID/PIN Settings window.
12. Press OK on the Copier Properties window.

