It is important to know how to edit quiz settings within Canvas whether you create the quiz within Canvas or imported the quiz from a Word doc or Joule.
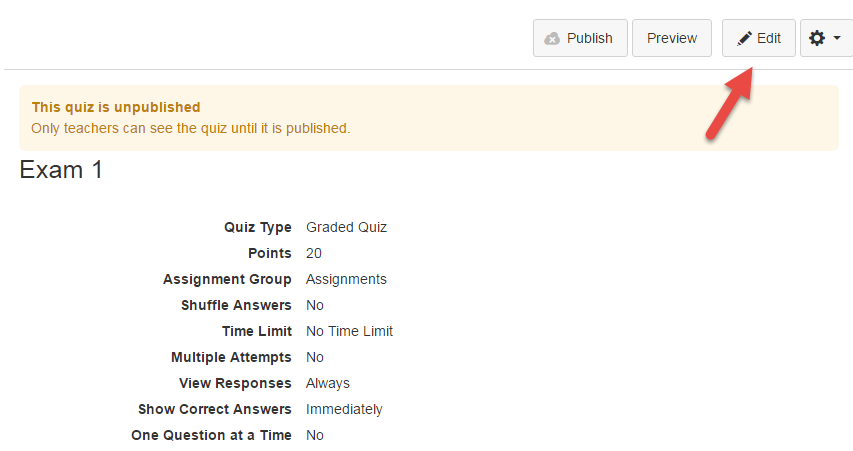
- Navigate to an online quiz within your course and click Edit.
- Canvas provides a variety of online Quiz options.
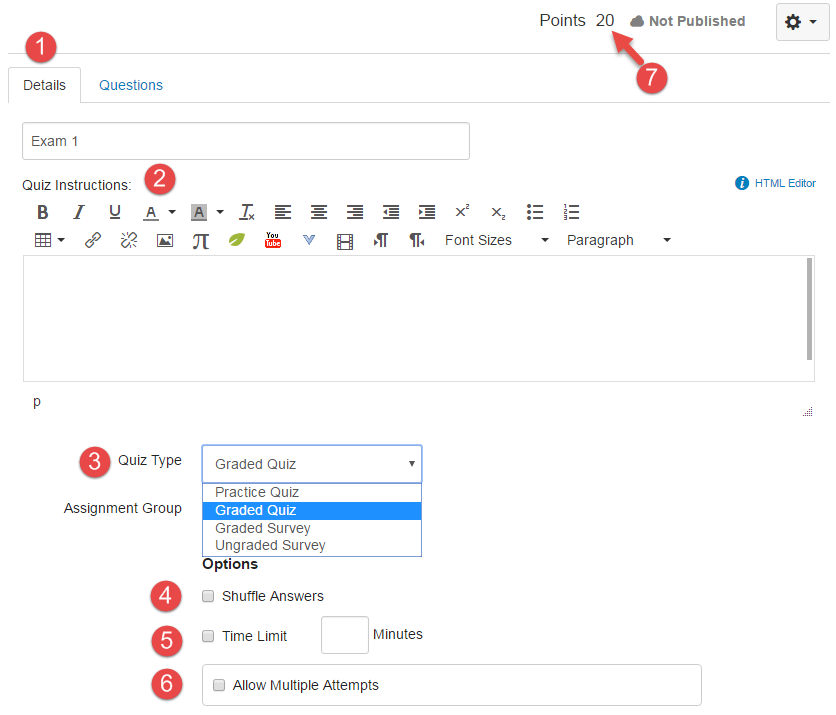
1. These options can be found on the Details tab.
2. Enter/edit the quiz name and description or instructions.
3. The Quiz Type drop-down box allows you to set the quiz to be a Practice Quiz, Graded Quiz, Graded Survey, or Ungraded Survey.
4. You can shuffle answers within the quiz questions. (Please keep this in mind if one of your question answers states "All of the above"; "All of these" might help avoid student confusion).
5. You can choose to set a time limit by entering the number of minutes students have to complete the entire quiz. Timed quizzes begin once a student begins the exam and will not be paused if the student navigates away from the quiz. If no time limit is set, students will have unlimited time to complete the quiz.
6. You can allow multiple attempts.
7. Canvas online quiz totals are determined by the total points assigned to each question in the quiz.
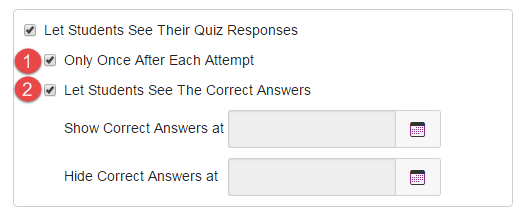
The Let Students See Their Quiz Responses checkbox allows students to see what they answered, any automatic feedback generated by the quiz for correct or incorrect answers, and which questions they got wrong. Quiz responses include both correct and incorrect answers. Quizzes default to this option, so if you do not want students to see their quiz responses, deselect the checkbox.
If you decide to allow students to see their quiz responses, you could restrict students to view their quiz results only once after each attempt.
- Students will only be able to view the results immediately after they have completed the quiz—results include both their responses and the correct answers.
The Let Students See The Correct Answers checkbox enables a green "Correct" tab on every correct answer for the entire quiz. Quizzes default to this option, so if you do not want students to see their quiz responses, deselect the checkbox.
- As a part of this option, you can also control when and for how long students can see the correct answers by setting dates (and specific times, if desired) in the Show and Hide fields.
To show answers immediately after quiz is submitted, leave the Show and Hide fields blank.
To create a date range to display the answers, set a start date in the Show field and an ending date in the Hide field.
To always show answers after a specific date, set a date in the Show field.
To hide answers after a specific date, set a date in the Hide field.
Note: If the Only Once After Each Attempt option is selected, it will override any show or hide dates or times. If you want to show or hide correct answers on any specific date or time, the Only Once option should not be selected.
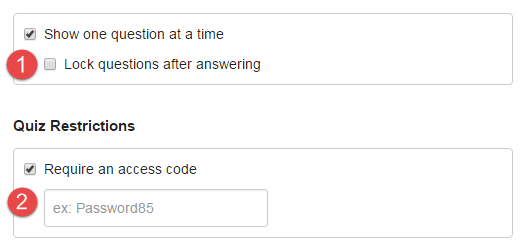
1. You can Show one question at a time; if you select this checkbox, you also have the option to Lock questions after answering. This option means that students cannot return to the previous question once it has been answered.
2. You can require students to enter an access code to take the quiz. (If you are using Respondus LockDown Browser, you must enter the same code within LockDown Browser as well because it will override the code you specified within these Quiz Settings. This also applies if you leave the access code field blank within LockDown Browser).
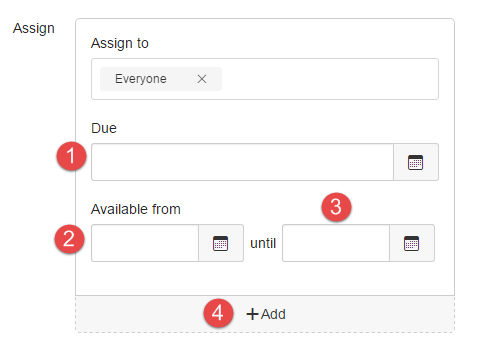
You can set the Due Date, Available From date, and Available Until date for the quiz. These fields are optional and can be set depending how you want to manage the quiz:
Due Date: the date and time that the Quiz is due.
Available From: the date and time when the Quiz will become available for students to take the quiz.
Until: the date and time when students can no longer take the quiz.
You can also assign different quiz due dates for different students within your course by clicking +Add.
See "Creating Quiz Questions within Canvas" for documentation on how to edit or create quiz questions within Canvas.
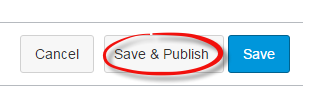
- Click Save & Publish when you have finished editing your quiz settings.
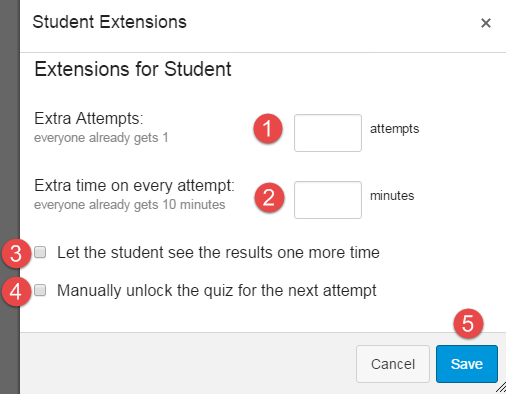
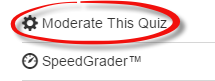
Once your quiz has been published, Canvas allows you to add extra attempts, time extensions, and to allow students to access their quiz results again.
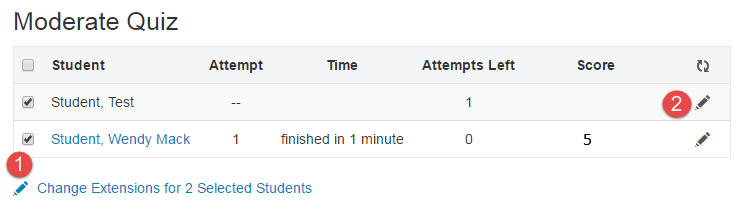
- Click on your published quiz and click Moderate this Quiz on the top right of the page.
1. To moderate more than one student, select the check boxes to the left of the students' names.
2. To moderate only one student, select the pencil to the right of their names.
1. Type the number of extra attempts you'd like to give to the students in the Extra Attempts field.
2. If the quiz has a time limit and you want to give students more time, type the number of extra minutes in the Extra Time on Every Attempt field. If the student hasn't taken the quiz, the extra time will be added to the student's initial attempt and additional attempts.
3. If the quiz is saved with the Only Once After Each Attempt option, you can let the student see the quiz results one more time. Results include both their responses and the correct answers. Once the student has viewed the quiz results, the results view extension will be reset and the results will be hidden again.
- Note: If the Only Once option is selected and students have also been granted an extra attempt on the quiz, students will be able to view the results before they take the quiz the second time, as well as after they complete the quiz. If students are allowed multiple attempts on a quiz, you may want to edit the quiz and select the Allow Multiple Attempts option, which gives an option to let students see their quiz responses only after the last attempt.
4. If your quiz is locked because of accessibility dates, you will need to unlock the quiz for the student by clicking the manually unlock the quiz for the next attempt checkbox.
5. Click Save.